As a reminder, you can check out my overview post if you're curious about why and in what ways I started using GPG and Yubikey. If you haven't set up your GPG keys yet, I also talk about a simple flow in my second post.
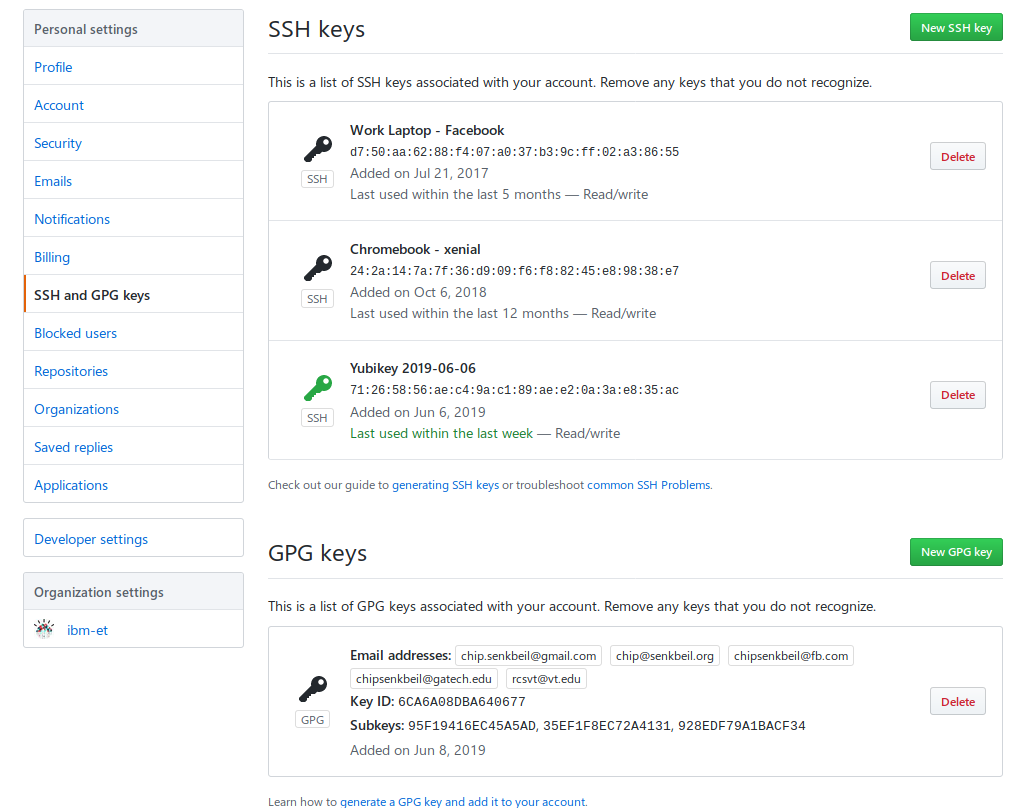
Today, we're going specifically into using GPG for authentication for SSHing into remote servers and associating with Github.
Using my GPG key for authenticating over SSH
One handy use case for GPG keys related to authentication is using a GPG key to
access remote servers over SSH. Rather than using password-based authentication
or SSH public key authentication via ssh-keygen, we can leverage a GPG key
with authentication capabilities to connect instead.
The prerequisite is that we need a GPG key with authentication capabilities.
Make sure that you have one by checking your keys and capabilities via gpg -k:

I've personally switched over my home servers to only allow public key authentication over SSH and am leveraging my GPG auth subkey rather than the traditional SSH key because it enables me to only manage a single key and I can store my GPG key on external hardware like a Yubikey in the same manner as my encryption and signing keys.
There are a couple of requirements to plug in a GPG auth key for use via SSH:
- Add the keygrip of the auth key to $HOME/.gnupg/sshcontrol
- Enable SSH support for the GPG agent
- Export the SSH auth socket from the GPG agent
- Copy over the ssh-rsa contents of the GPG auth key to the remote server(s)
More Details
Based on this article from April 2019, we need to make ssh aware of GPG auth keys.
As mentioned, the first step is to get the keygrips of auth keys via
gpg -K --with-keygrip and place them into $HOME/.gnupg/sshcontrol.
From there, the second step is to make sure that gpg-agent is configured with
ssh by adding enable-ssh-support to $HOME/.gnupg/gpg-agent.conf and
restarting the agent via gpgconf --kill all. We can also manually launch the
GPG agent via gpgconf --launch gpg-agent if needed.
The third step is to set SSH_AUTH_SOCK to the GPG agent's SSH socket, which can be done by adding the following export to our Bash - \(HOME/.bashrc__ - or Zsh - __\)HOME/.zshrc - config:
export SSH_AUTH_SOCK=$(gpgconf --list-dirs agent-ssh-socket)
Lastly, the fourth and final step is to add an ssh-rsa public key to the
remote server(s) where we want to use our GPG auth key to connect. This makes
them aware of valid keys to accept incoming requests. We can get the key via
ssh-add -L, which should output one or more ssh-rsa public keys based on our
GPG auth key if the agent has been configured correctly and we have exported
SSH_AUTH_SOCK*.
Copy entire output from ssh-add -L to each remote machine's
$HOME/.ssh/authorized_keys* file, or alternatively use
ssh-copy-id <username>@<server> to smart copy the keys over that do not yet
exist.
I had two keys show up, one with my card number for the yubikey and one listed as none. I only added the key that had the card number to my remote servers and it worked fine.
Connecting my GPG auth key with Github for SSH

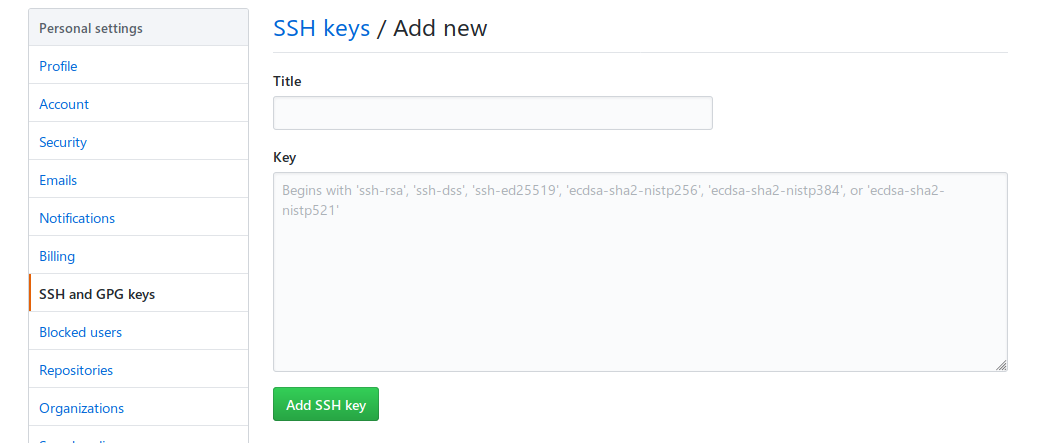
Adding support for Github authentication is very similar to the steps listed for
a remote server that you own with the distinction that we need to copy the
output of ssh-add -L to a textbox on Github's website when adding a new SSH
key (our GPG auth key).

What's next?
In the next post, I'll be explaining how configure a Yubikey to host GPG subkeys for encryption, signing, and authentication as well as my process to maintain a single set of keys across multiple Yubikeys for different computers and other devices.